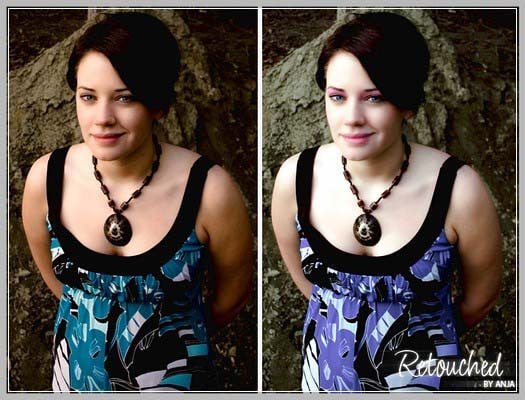
13 Nov Apply Digital Makeup using Photoshop

Today I will show you how to apply digital makeup and additionally, how to change the eye color, smooth the skin texture of a model and enhance the image. The method is really easy and I’m sure you will have no problem in acquiring it. So let’s have a try…
Though the process of applying makeup using Photoshop is fairly simple, the most important thing about digital makeup is that, by all means, it must look natural. It’s always better to “underdo” it than to overdo it, so keep that in mind while following this tutorial. Less is more, therefore try to be subtle.
The initial image
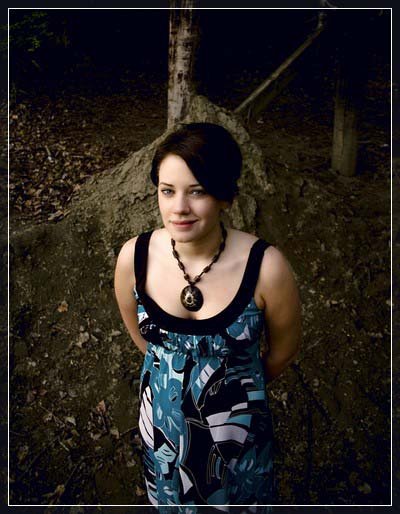
Step 1
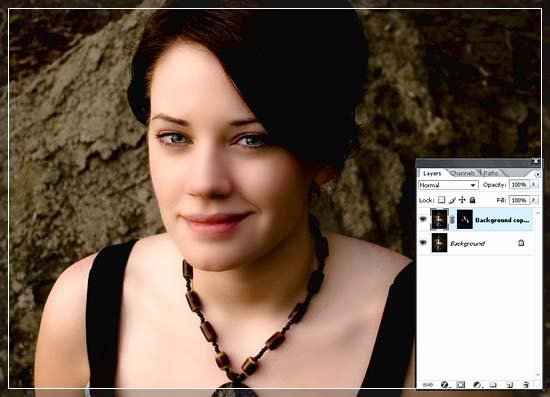
First of all, we’re going to smooth the skin texture of the model. This will give the whole image a professional feel and improve its overall aspect.
Duplicate the background layer and go to Filter -> Noise -> Median and insert a value of 3. Next, go to Filter -> Blur… -> Gausian Blur … and insert 3 again.
Add a layer mask to the layer you just blurred, fill it with black and start painting with white over the skin, with a soft brush, varying the size according to the area. Make sure you avoid the lines of the face, eyes etc. because you don’t want to blur those, just the skin.
Step 2
Now we’re going to change the lip color to mimic a light pink lipstick. First, press Q in order to enter the Quick Mask editing mode, and then choose a soft brush, choose black as the color and then zoom in and paint over the lips. You’ll notice that instead of black, it will seem as if you were painting with red; this is because you’re in the mask mode. Make sure you don’t go over the edges. If you make any mistake, just choose white and paint over that part.
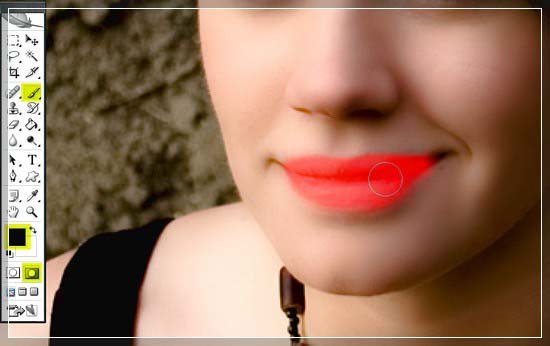
Switch back to Standard Mode by pressing Q again and you’ll notice a selection appear. The advantage of using the mask mode to select is that you have far more control over the selection than by using the Lasso Tool.
Go to Select -> Inverse and then to Image -> Adjustments -> Hue/Saturation… (or simply press Ctrl+U for the dialog box to appear) and insert the following settings:
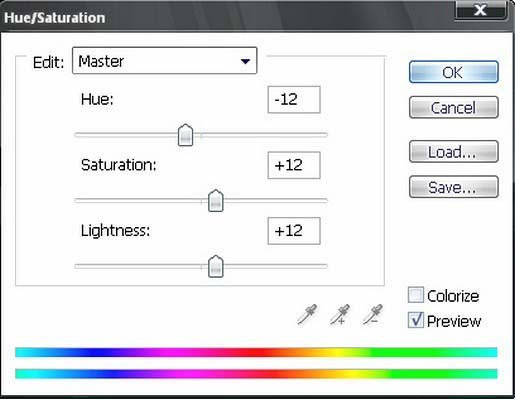
Press Ctrl+H to hide your selection (this will not deselect the area, it will just make the marquee around it disappear), so that you can see clearly the edges of the selection. If you notice that an unwanted area around the lips turned pink, simply press Q to enter the Quick Mask Mode again, zoom in and carefully paint with black over that area. Then switch back to the standard mode by pressing Q again and take a look at the result.
Add a subtle highlight on her lower lip by using the Dodge Tool, a small soft brush, exposure set to 70%. With a slightly bigger brush you may highlight her upper lip, again in a very subtle way.
When you’ve finished, make sure the area of the lips is deselected to continue to the next step.
Step3
To change the eye color, select the eyes by using the same method you used for the lips, and then press Ctrl+U to bring up the Hue/Saturation dialog box, check Colorize and use the following settings:
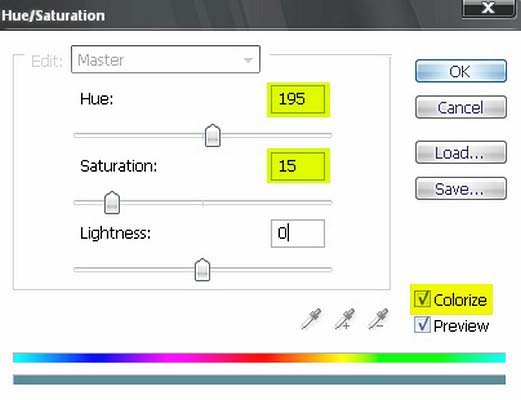
Press Ctrl+H and check for any mistakes. If there are any, fix them as previously shown with the lips.
Step 4
Now we’re going to do the eye makeup. Select the eyelashes on her lower eyelid by using the Lasso Tool, with a feather setting of 5. Go to Image -> Adjustments -> Brightness/Contrast… and lower the Brightness to -10. Deselect the area.
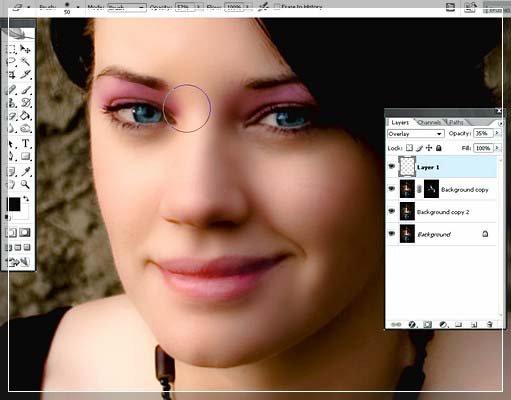
Create a new layer and paint with a purple, soft brush on it, over the area between her eyebrows and eyes.
Set the layer blending mode to Overlay and the Opacity to 35%. Then refine the edges of the area by erasing with a large soft brush around it, making sure it blends in well and looks natural.
Step 5
To enhance the effect of the image, we can now adjust its color cast to better match the changes we made.
Add a Selective color adjustment layer with the following settings:
Reds: -43 0 -22 +7
Yellows: 0 0 0 -41
Neutrals: 0 0 0 -7
Step 6
Add another Selective color adjustment layer, in order to change the color of her dress from cyan to purple:
Cyans: -100 +100 -100 +100
You will notice that this layer will slightly affect the color of the eyes. I actually liked it better that way, so I didn’t change it.
If you don’t like that, then choose a soft brush and paint with black on the layer mask of the adjustment layer (I’ve highlighted it with yellow on the following screenshot).
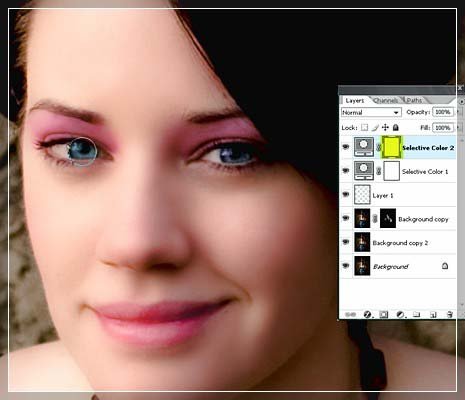
Finally, go to Image -> Adjustments -> Auto Levels to really bring out the colors of the image and remove the somewhat reddish color cast it had.
Final Product:

Hope you enjoy it and find it useful, drop me a comment if you have any suggestion. Have a nice day!
Credit: i-love-photoshop.blogspot.com

Pingback:» Blog Archive » How To Apply Makeup Using Photoshop
Posted at 22:30h, 28 September[…] Apply Digital Makeup using Photoshop – Clipping Design – Create a Fantastic Abstract Design in Photoshop In this tutorial I would like to present how to create a fantastic abstract design in photoshop. […]