09 Apr Complex Masking Method in Photoshop

Today i would like to share complex masking method in Photoshop. In this tutorial we will describe some easy process of cutting out a person from a scene using advance masking method, and then we’ll paste the person in another photo’s background. So let’s have a try……
For this tutorial we need:

Step 1: Create new channel using Calculations
This tool merges two channels for creating a new one. This is great because we can create a new channel that contrasts the model and the background.
a) Open your image and double click on it in layers palette to make it editable
b) Select the channels palette
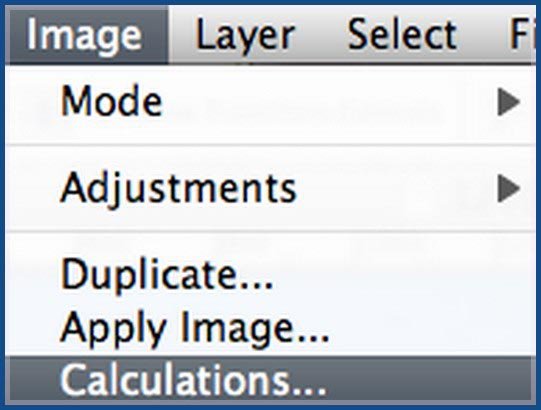
c) Select Calculations in the top menu: Image > Calculation

d) This tool merges two channels for creating a new one. Usually we select the red one above and the blue one below. In this case because of the contrast between the hair and the sky we will select the Green channel above and the blue below.

e) Now for the mask to work we need that the inside of the model is completely with an the background black, so we select invert the blue channel

f) Now we set the blending mode to subtract with a 100 percent offset (90% of the cases you will use this blending mode)

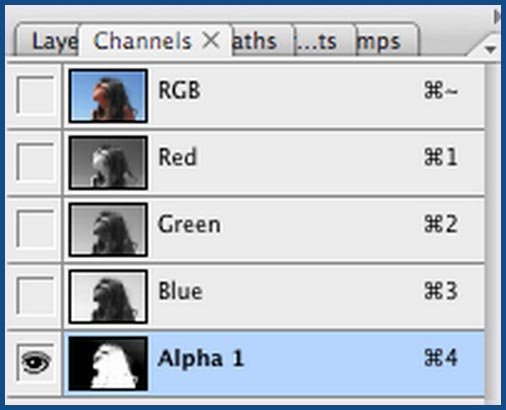
g) Select Ok to create the new channel. This will appear in the channels palette as Alpha 1

As you can se all the hair strains are perfect white and insolated.
It is very important to notice that these are the settings for this particular image. Every image is different so according to the case you will have to play with the settings like the channels or the blending mode to achieve the best mask.
Step 2: Creating path for the face
Now as you can see certain areas of the face and part of the neck and body are not perfect white.
Since this is made of curves we can use the pen tool for these areas
a) Deselect the new alpha 1 channel, select the RGB
b) Create a new path using the pen tool following the face contour and selecting parts of the head, neck and body

c) For this tutorial we are assuming you are familiar with the pen tool. In case you are not next week we are going to publish a tutorial specifically for pen tool.
d) Select path in the palettes and in the options select make selection

e) Enter a feather radius of .5 pixels

f) Return to the alpha channel (select only this channel) and paint this mask with white.

Step 3: Fine adjusting
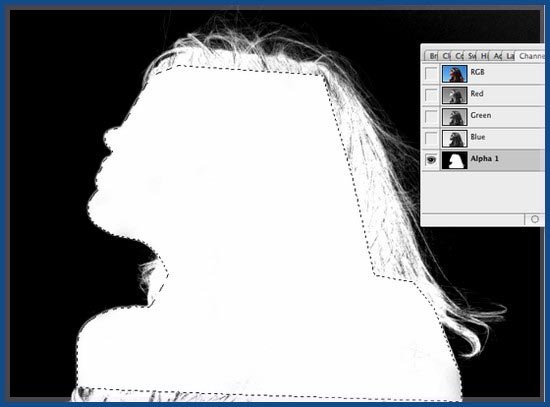
We still have some areas like gray or with small part of white, and it should be perfect white and black
a) Select a soft brush
b) Set the mode of the brush to overlay, if you select a white color it will only paint in the white parts, not painting the black ones (important the brush must be set to overlay)

c) Now select a black color to fine paint the black parts
d) Your channel should look like this:

Step 4: Create the mask
a) Deselect the alpha 1 channel and select the RGB
b) Return to layers
c) Load the selection, in the top menu: Select > Load Selection

d) Select the Alpha Channel 1 and click on invert

e) Now delete the background

Step 5: Fine adjusting hair
Now we have some fringe (blue color in the hair) caused from the blue background, there are different forms to correct this.

a) Create a new layer
b) Load the alpha channel mask Repeat C and D from step 4 but DONT SELECT INVERT this time)
c) Remove the inner part of the mask (face and neck) you can do this using the polygonal lasso selecting subtract from the selection.

d) Using the eye dropper sample some color of the hair and paint the selection with this color

e) Soft the inner part of the mask using a soft brush with the eraser tool

f) Set the blending mode to color

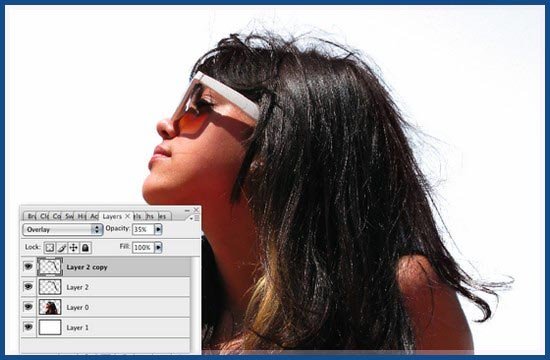
g) Duplicate this layer and set the blending mode to overlay at 35%

Final Result:
Now we can use any background and we have all of our hair even the thinnest strings.

Hope you can learn something amazing from this tutorial.
I feel really glad if you give me feedback through comment below. Soon i am going to show more interesting & innovative tutorials so please keep visit our blog. That’s for now.
Have fun!
Reference: webdesign.org

grady
Posted at 08:43h, 29 AprilYah, very valueable tutorial, but looks like this for advanced, because we do with channel, calculation. thanks anyway.