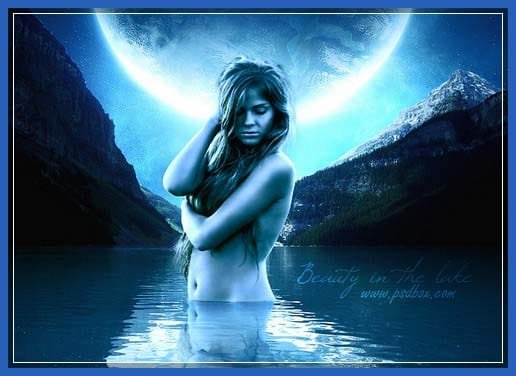
01 Dec Create A Night Scene Effect in Photoshop

Today I would like to share an amazing Photo manipulation tutorial. In this tutorial I will show you how to create a night scene environment. You will learn how to use the burn tool to create a very nice effect on a body and how to turn a daylight picture into a night scene. Let’s have a try…
Materials needed
- Cosmos sky by resurgere
- Mountain Lake by Zac Donald
- Woman
Step 1
The first thing you have to do is open the mountains lake picture; this will be your base for this artwork. I resized this image to 1000×750 but later one I realized that I shouldn’t have done it.
Let me point out why. The reason why I scaled it down is because the sky stock image that I added next is only 1200px wide but I could have blended it with a solid color to fill up the empty space. The reason why you should use the full size image is because later on you will have greater control over the girl’s face details when you get there.
So once you open the image cut out the sky with the Pen Tool (P) and masks it or deletes it. Make some adjustments using Adjustment Layers. I increased the mid tones using Levels and I changed the overall color of the image using a Gradient Map with Hard Light blend mode. I also added a blue outer glow to the mountains with blend mode Vivid Light.

Step 2
Download the Resurgere cosmos pack and get the cosmos2_0002.jpg. You can use another image if you want, just try to use one with blue tones because it will make your job easier. I went for a blue tone of my final result but if you want another color now it’s a good time to decide.
Paste your sky below the mountains layer and increase the contrast. I flipped the image vertically because I like it more like that.

Step 3
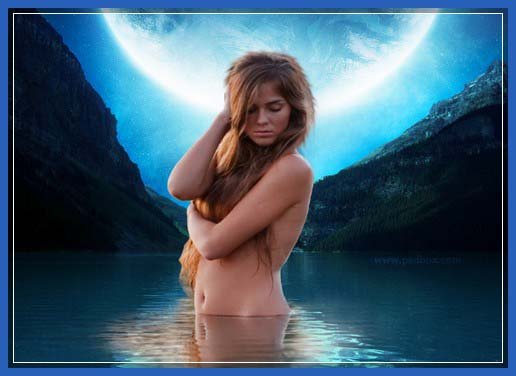
Now open the woman image and use the Pen Tool (P) to subtract her from the original background. Make sure you also pick up the reflection too. Paste the image on a new layer above the sky and the background layers. If you’re using the 1000×750 resolution like I did, scale the woman to about 60% of the original size.
Don’t worry about the hair right now. Just cut the basic shape. Use a layer mask and a soft brush to blend the bottom part that contains the reflection with the water. See image below.
Step 4
Now you have to recreate the hair because the sharp edges don’t look good at all. In order to do that you will have to use the Smudge Tool. Set the size of the Smudge brush to about 15px, Strength to about 45% and smudge the edges of the hair.

Step 5
Now decrease the size of the smudge brush to 1px and increase the Strength to 85-95% and smudge the hair again but this time creates the single hairs. Make long undulated strokes. If you have a tablet this is easier to do than with the mouse. I used the mouse.

Step 6
This is a very important step. If you make this right you can end up with a very nice result. You will use the Dodge and Burn tools to enhance the body of the woman and get that soft/glossy look on her skin. This is a very used technique on portrait and general body manipulations.
Create a new clipping mask layer for the woman and fill it with 50% gray. You can do that by going to Edit>Fill and choose 50% gray from the drop-down list. Then, change the blend mode to Overlay and rename the layer dodge/burn.
As you can see on the image below I duplicated the woman layer and placed it as clipping mask then I added some surface blur but you don’t necessarily have to do it because the change is minor.

Now, get the burn tool, set Range to Midtones, Exposure to 7-8% and brush along the darker areas of the body. Use a medium size soft brush. Then do the same with the Dodge tool but this time brush the lighter areas of the body. Make several passes.
I know that this can be a pretty abstract task specially for beginners that are not used to this technique. If you make mistakes use the Brush Tool and paint back with 50% gray.
On the hair area I used a small brush and I tried to dodge and burn on a more detailed level. I tried to burn even single hairs.
With this technique you can even change the face features of a person. Take a look at the image below to see where I used the Dodge and Burn tools.
If you don’t see any difference, just try deactivating the dodge/burn layer and you’ll see it.

Step 7
Now you can start blending this woman with the surrounding scene. The first thing you’ll need to do is to change her color. Open the layer styles of the woman layer and activate Inner Shadow, change the color to a dark cyan as shown below and blend mode to Color Dodge. I used the Inner Shadow because I wanted to enhance the bounce light on her back
Activate Color Overlay, change the blend mode to Linear Light and color to a dark blue. See image below for more details.

Add a Levels adjustment layer and increase the highlights and lower the midtones. Then add a Black & White adjustment layer and use the settings shown in the image below. I set the opacity of the Black & White layer to 70% in order to keep some of the natural color of the skin.

And that’s it; everything is ready for the post editing work.
Step 8
What I always do when I’m done is create a stamp. Select the top most layer and use the shortcut Shift+Ctrl+Alt+E to create a stamp. It basically creates a new layer with everything that you see on the screen, so make sure all layers are activated before you stamp. From now one you will work on this stamp.
You should transform this layer into a Smart Object because you will apply some filters and you want them to be non-destructive. So right click on the layer and choose Convert to Smart Object.
Go to Image>Adjustments>Shadow/Highlights, expand the advanced settings, reduce Shadow Amount to 0, increase Midtone Contrast to about 43 and Color Correction to about 20.
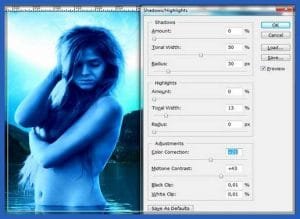
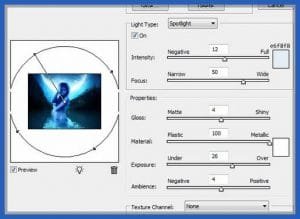
Then go to Filter>Render>Lighting Effects. Use the settings shown below.
Final Result:
That’s about all that I did to this image. You can make more contrast adjustments if you want. I decreased the size of the final result and I applied some sharpening. It looks better than the original size.

Hope you like this tutorial.
If you have any suggestion, please drop your comment below.
Have a nice day.
Credit: psdbox.com

Sorry, the comment form is closed at this time.