
01 Dec Create an Amazing Geometric Shaped Typography in Photoshop

In this tutorial you will learn the processes of complicated designing to create a really amazing geometric shaped typography with grungy background in Photoshop. This is a simply amazing tutorial yet the effect looks marvelous. Let’s have a try…
Along the way, I will also give you some tricks that you can use for creating awesome lighting and smoky effect to spice up your design.
The techniques involved in creating this typo include layer blending, filter effects, image adjustments and custom brushsets. Hope you enjoy it!
OK let’s get started!
To complete this tutorial, you will need the following stocks:
Font
Step 1
Create a new document sized 1200 * 1700px, fill the background layer with black color. Create a new layer on top of it and grab the brushset we just downloaded and paint some grungy texture as shown below:

The trick here is to set your brush flow and opacity to a relatively low level, both around 30% – 40%, and vary the brushset size when you paint. Also don’t stick with one brushset, try mixing different ones together and see what result that brings you.
If you want to skip this step, you can simply download a copy of this background texture here.
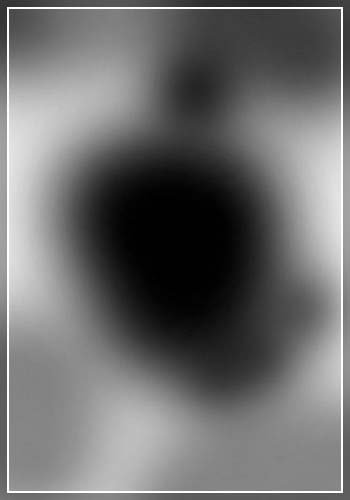
Now we want to make a space for our text and create some depth for the image. To do so, on the texture layer, add the following layer mask to it:
To adjust the lighting contrast a bit, we can add a Curves adjustment layer on top of all previous layers.

And here is the effect so far:

Step 2
Use the font we download before, type and position the text as shown below: (Use a dark gray color as font color)
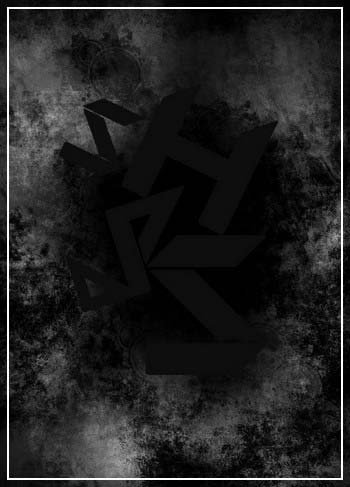
Tips: type the texts on separate layers, use the free transform tool (Ctrl + T) to rotate and fit them together.
Once you’re happy with the position, rasterise and merge those text layers and apply the following layer blending option to the merged layer:
Drop Shadow
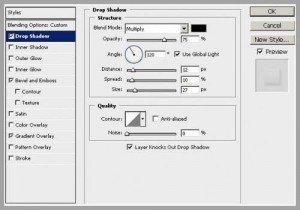
Bevel and Emboss

Gradient Overlay

and you will have the following effect.

Now we’re in the fun part of this tutorial – Duplicate this merged text layer five times, and set each layer’s opacity as shown below:

Use your up and right arrow key on your keyboard, repeatly type them until each layer separates from each other and form this effect as shown below:

Step 3
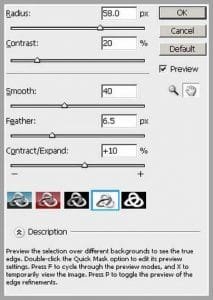
Load the selection of the last text layer (hold ctrl + left-click the thumbnail image of that text layer on the layer pallette), and apply the following refine edge settings:
Maintain the selection, create a new layer called “cloud” and render some cloud in it: (Black and White color)

Duplicate this cloud layer three times, and drag the last text layer on top of the duplicated cloud layer, you will have the following effect:

Duplicate the cloud layer twice, and drag the two layers on top of text layer, change their blending mode to “overlay” and you will have the following effect:

Step 4
Now we can add some colors onto the image to spice it up a bit. To do this, I simply create a new layer called “color 1″ on top of all previous layers, and grab a big soft round brush and select some color I like to paint over it:

Change the blending mode of this layer to “overlay”.
I also want to highlight the edge of the grungy background, so I add another layer called “color 2″ and grab a brown color brush to paint around the edges:
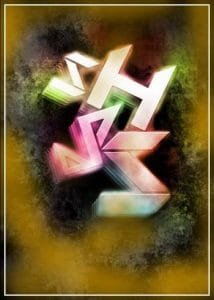
Set the blending mode of this layer to “color dodge”.
You can also highlight some part of the text; simply create another layer called “highlight” and grab a white soft round, big size brush and paint over desired area:

Change the blending mode of this layer to “soft light”.
For final refinement, I added two adjustment layers on top of all previous layers
Curves

Color balance

Apply the following mask to the color balance adjustment layer:

Overall, you will have the following effect:

Ok that’s pretty much it for this tutorial! Of course this doesn’t stop you from enhancing it and put it some your own creativity to it.
I further added some lines and apply some of this brushset around the edge of the text.
Here is my final effect for this tutorial: (click to enlarge)
Final Result

Hope you enjoy this tutorial and find it useful and inspirational!
If you have any suggestion, please drop your comment below. Have a nice day.
Credit: psdvault.com

Sorry, the comment form is closed at this time.