20 Dec Create an Extremely Horror Effect in Photoshop

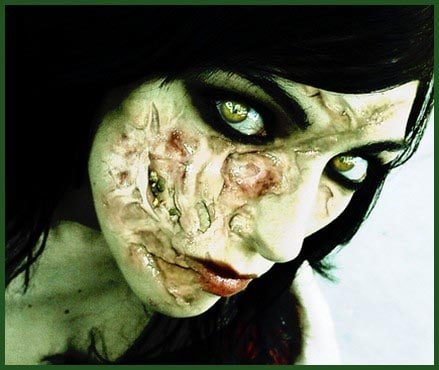
Today i would like to share a surreal horror effect tutorial. In this tutorial you can learn how to create extremely horror effect in Photoshop & give your face a zombie look, in just a few steps. So let’s have a try…
Step 1
Open this photo of a girl. You can use your own if you like.

Step 2
Open another photo. I use a photo of an operation. Anything that looks disgusting works. Remember we’re trying to scare people with a real zombie looks! You can download this picture here.

Step 3
Please don’t throw up on the screen. In a few minutes it will be over. Well, what we need to do here is just select a part of this disgusting image. Grab the Lasso tool and make a selection.

Then go to Select > Modify > Feather

And set 20 for the feather radius:

Copy (Ctrl + C) the selection.
Step 4
Paste (Ctrl + V) the selection into the image of the girl and scale it down a little. You may have to rotate it as well.

Step 5
Go to Image > Adjustments > Color Balance or hit Ctrl + B. Use: -19; 16; 1 for the values. Check the image to see where to put them.

Hit OK.
Step 6
Go to Image > Adjustments > Brightness and contrast. Use these settings: Brightness: -32; Contrast: -13

Step 7
We need to cover most of the face with these disgusting parts. So go back to the “operation” image and select another part. Paste it on the girl face, scale it down, rotate it and repeat steps 5 and 6 to match the color.

If you see that the edges of the pieces you’ve pasted are a little sharp just grab the Eraser tool. Use a soft brush and set the opacity to about 40% and start erasing the edges. This way it’ll look that they are really coming from the real skin.
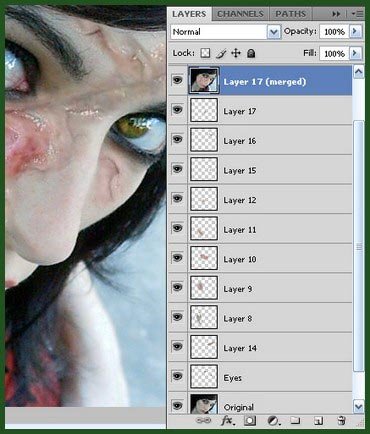
When the face is covered you’ll have a lot of layers with tiny parts of Zombies.

You see. We’ve covered part of the chin, below the eye, the forehead and a part of the nose.
Step 8
Now go back to your original layer and select the eyes.

Copy the selection and paste it in a new layer.
Go to Image > Adjustments > Color Balance or hit Ctrl + B. Use 0; 0 and -83 as you can see on the image below:

Set this layer to screen mode.

Step 9
Now we need to merge all the layers involved so we can adjust the complete image. For this we need to select the original layer, hold down SHIFT and click on the top layer. Now you have all layers selected, right? Press Ctrl + Alt + E. Now we get all the layers in one new layer and we still keep the other layers (just in case you need to make any changes)

Step 10
Duplicate this merge layer. Go to Layer > Duplicate Layer or just hit CTRL + J. With this duplicated layer selected go to Image > Adjustments > Hue/Saturation and set the following values:

Hue: 81; Saturation: 15; Lightness: -1
You should get something like this:

Hit Ok. Set this layer to Linear Light mode and the Opacity to 77%

Step 11
Now you see why we need to keep the old layers too. Duplicate the “eyes” layers and place it on top of the layers.

You see it’ll keep the screen mode.
Now go to Image > Adjustments > Curves and use these settings:

Try to copy the curve on this image as good as possible.
Final Result:
Now hit Ok and you’re done!
This is the final result:

Hope you can learn something new from this tutorial & find it useful.
I feel really glad if you give me feedback through comment below. Soon i am going to show more interesting & innovative tutorials so please keep visit our blog. That’s for now.
Have fun!
Credit : csscreme.com

maziar
Posted at 16:55h, 09 Novemberveri nice