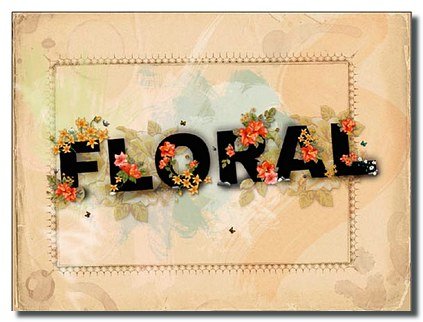
07 Oct Create Wallpaper with Floral Text Effect

Today I am going to introduce you how to make a wallpaper with flower text effect using Illustrator & Photoshop. It’s pretty easy. But of course, I want my readers to have at least the basic knowledge of Illustrator & Photoshop. Please note that, I am using Illustrator CS and Photoshop CS3 for this tutorial. The same effects can be made in other versions too. So, let’s start…
Step 1
Open Illustrator and create a new document 1024px width by 768px height, with an RGB color. Select type tool (T) and write “FLORAL” in black (#000000). You can use any other color if you wish to. Keep the font as Arial Black, size as 150pt, leading as 180pt and tracking 0 as shown below. Name the layer as “floral”.

Step 2
After creating the floral layer, copy the layer and move it below the floral layer. Name it as “floral_style”. Now disable the “floral” layer and click on the “floral_style” layer. Open the graphic style by clicking Windows > Graphic Styles (Shift+F5). Once the Graphic Style dialogue box is open click on the right side button to get the drop down list. Select Open graphic style > Library > Artistic Effects.

Once the Artistic Effects dialogue box opens click on the “Paint Brush” effect.

Now keeping the “floral_style” layer selected make the stroke color as black (#000000). You should get something like this.

Step 3
Then go to Effects > Blur > Gaussian Blur. Keep the Blur Radius as 6.0 and hit OK. This will give some shadow to the text. It will look like this now.

Step 4
Now we will be adding the flowers to the text. The flowers I have used can be downloaded from here.
Open the fbg_lldkiejn.ai file in Illustrator. We will be using different elements from this file to create our floral effect. Ungroup the shown image from the open file.

After ungrouping, take two yellow flowers and place them as shown below in the middle of the “floral” and “floral_blur” layers. Your image should look like this now.

Step 5
After this, start ungrouping some more flowers from the image and start pasting them around the text. Try to get something similar to this.

Step 6
Let’s add some stones to it. Go to Windows > Symbol Library > Nature. Add some stones to the image. Now select everything (Ctrl+A) and group (Ctrl+G) or go to Object > Group.

Step 7
We are done with Illustrator now. Open Photoshop and create a new document with 1024px width and 768px height. Keep the resolution as 100px and background as transparent. Save it as floral_wallpaper.psd
Step 8
For the background we will be using a paper texture. Download the old paper background texture from here.
Open this texture in and place it in your psd. Select it and go to Edit > Transform > Rotate 90O CCW. Adjust it properly with the document size. Name it as “paper”. You will see that there are some black portions around the image. Select it with the magic wand (W) tool and delete.

Now make a layer below this paper layer and fill it with #dab787. After deleting the black potions Ctrl + click on the paper layer. Go to Image > Adjustments > Brightness/ Contrast. Give brightness as +52 and contrast as -50. Hit OK. Change the blending mode to Luminosity and opacity to 57%.
Step 9
Drag the grouped floral text from Illustrator to Photoshop. Place it above the paper layer. Tilt it a bit. Double click on the floral text layer and add some drop shadow to it. Give Blend Mode as Luminosity, Opacity as 45%, angle 120degree, Distance 3px, Spread 4% and size as 6px.


Step 10
It’s time to add some watercolor and coffee stains brushes to the background now. You can download the watercolor brushes from here and coffee stain brushes from here. Once you have applied different watercolors and coffee stains brushes decrease the opacity and change the blending mode of some of them. Make sure to use a different layer for each of brush so that you can play with the opacity and blending mode easily. I have made it like this.

Step 11
We will add some more shadow to the text layer so that it gets some depth. Make a new layer below the text layer. Take brush tool (B) and with a soft rounded 40 px brush and opacity 57% make some areas near the text layer as black. Erase any part which overlaps with the text. It should come out something like this.

Step 12
We are almost done! But the wallpaper is looking a bit empty. So, let’s add some butterflies to it. I have used Illustrator default butterfly symbols. You can get them from Windows > Symbol Library > Nature

Conclusion
Finally here we’ve got the result. Hope you like this. If you have any questions or suggestions please contact us & You can also put your valuable comment below. Have fun!
Final Product

Credit: psdrockstar.com

vlad
Posted at 18:49h, 09 AprilThanks, good work.
How to make text with flover textute?
Thanks
lokesh
Posted at 09:10h, 15 Octoberyes this
akshay kodre
Posted at 10:55h, 16 Junejust wanna make beautiful quote for my bro