
13 May Creating Stylish Dark Art Picture in Photoshop

In this tutorial we are going to show you how to create stylish dark art picture in photoshop. We use very simple technique, stylish background, transform picture with an amazing manipulation effect. So, why not have a try…
These are the stocks needed for this tutorials, click here to download
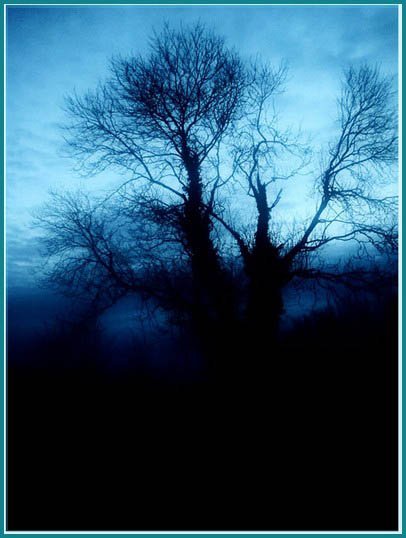
The first you open this picture, press Ctrl+J to duplicate layer then change blend mode: Soft light
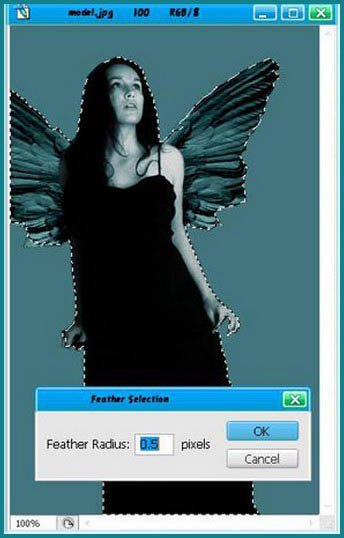
Cut the lady out of background (Feather=5)
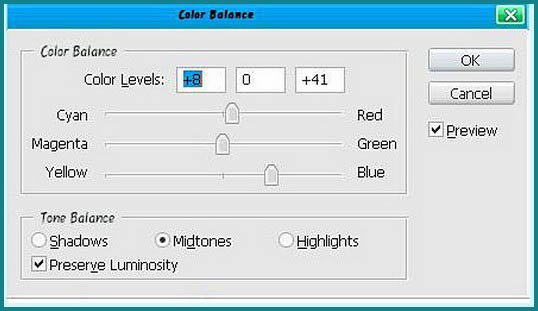
Move the lady to the first picture, press Ctrl+B to open Color Balance, set information like this:
Press Ctrl+J to duplicate lady layer, blend mode: Screen and adjust Opacity of layer copy: 70%. You will get the result:

Open cloud stock, use Elliptical marquee tool to make selection like this (Feather=20)
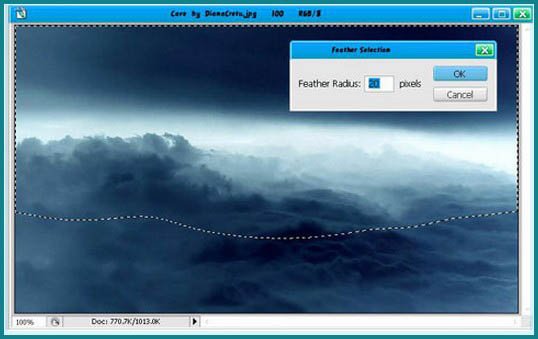
Move selected part of cloud to background, use Free Transform (Ctrl+T) to make it fit in background, change blend mode: Screen

Duplicate cloud layer, use Free Transform (Ctrl+T) to reverse layer copy then move it to bottom of background

Get Moon from this stock, feather 10px:
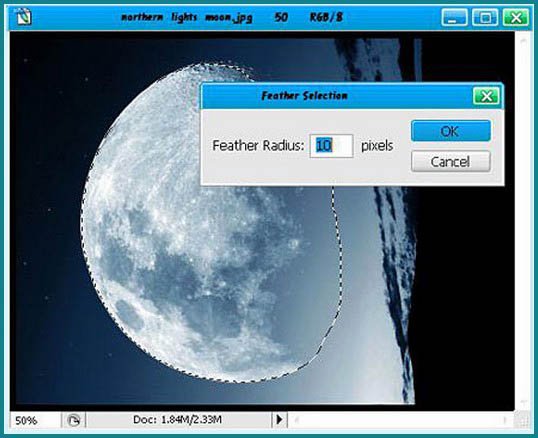
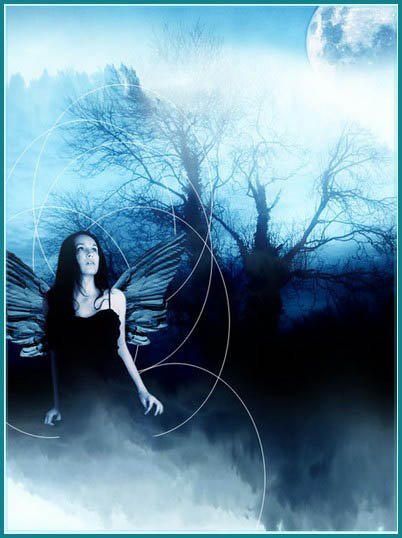
Move moon layer to background and put it under cloud layer. Press Ctrl+B to open Color Balance and set information like this:
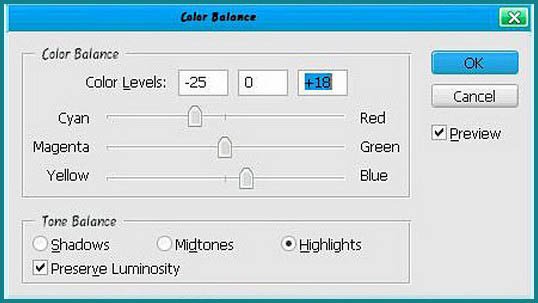
You will get:

Use Elliptical Marquee Tool to draw a lozenge then click Right mouse, choose Stroke: white, 1px

Duplicate lozenge layer to make another layer copy (about 5,6 layers) then sort them like this:
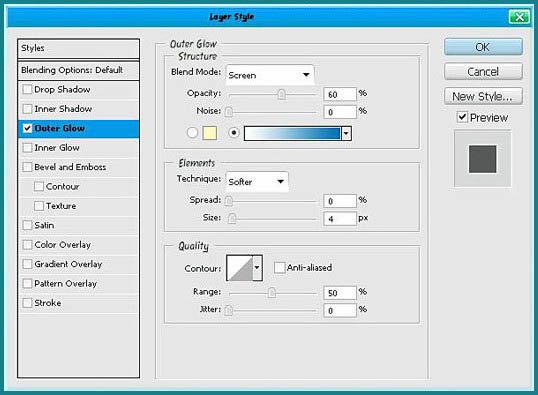
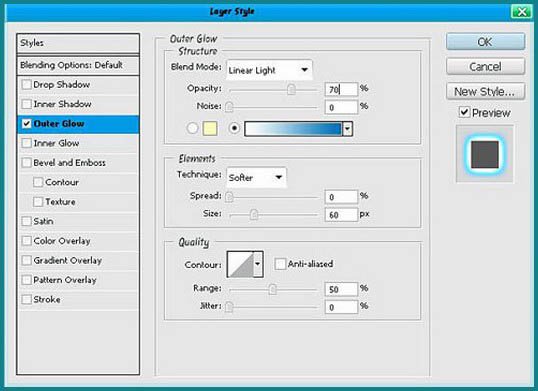
Merge all lozenge layers to one layer then open Layer Style, set information like this:
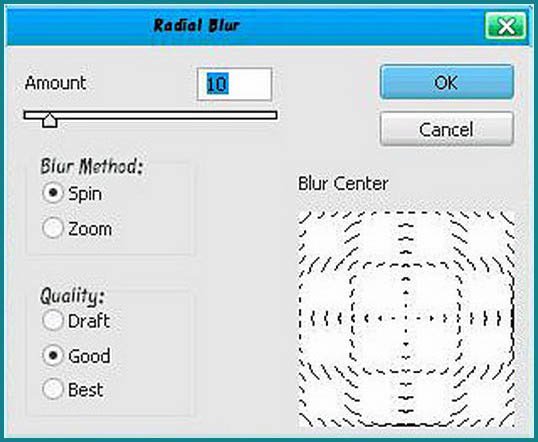
Go to Filter -> Radial Blur:
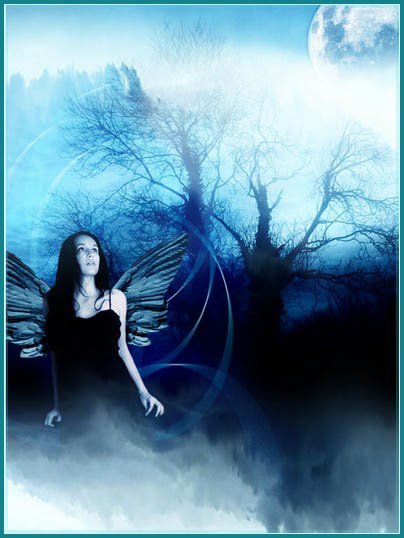
Duplicate one more layer to make the ribbon lighter, then continue merge them to one, change blend mode to Hard light, you will get:
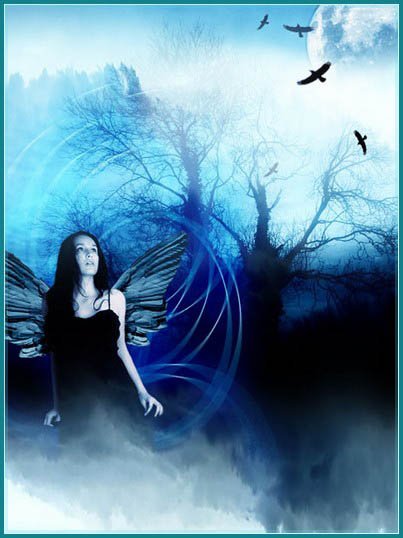
Duplicate layer, use Free Transform to revolve lozenge like the picture below:

Put some birds over cloud and you will have:
Move “paper” stock to background then change Blend mode to Linear Burn:

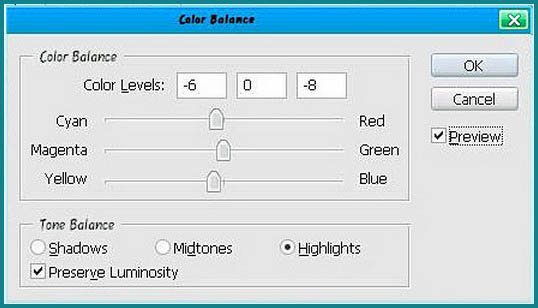
Open Color Balance (Ctrl+B) of paper layer, set information like this:
Final Result:
Hope you can learn something new from this tutorial.
I feel really glad if you give me feedback through comment below. Soon i am going to show more interesting & innovative tutorials so please keep visit our blog. That’s for now.
Have fun!
Reference: photoshop-garden


Sorry, the comment form is closed at this time.