29 Nov Design A Sensational Light Effect in Photoshop

Today I would like to share a marvelous light effect tutorial. In this tutorial you will learn the professional techniques to create an amazing effect. Let’s have a try…
Stocks Used:
- Model Stock Image
- Smoke Stock Image
- Fluid Wave
1. Step
Open the file called “Roselyn Sanchez” and duplicate it. Contour image and apply a mask.

2. Step
Create a new layer below the layer called “Background copy”.

3. Step
Select the “Gradient Tool”, go to the “Radial Gradient” and select white as the center color and a light gray as the exterior color. Now fill the “Layer 1”.

4. Step
Go to the Layer called “Background copy” and desaturate the image.

5. Step
Now go to: Image / Adjustments / Levels ( cmd+L (MAC), ctrl+L (PC)), and set the values as in the image.

6. Step
Create a new Layer above all. Choose the “Gradient Tool” / “Radial Gradient” and select the white as the central color and the transparent as the exterior color.

And create small ray of light as in the image.

7. Step
Now create a new Layer, set the “Blending Mode” from Normal to Color and again with the “Gradient Tool” repeat the previous step, but select a dark pink as the central color and the transparent as the exterior color.


8. Step
Create a new Layer and do the same thing done before, but using the cyan as the central color.

On a new Layer now, with the “Pen Tool” create a kind of lattice following the girl’s right arm.


9. Step
Select the “Brush Tool” and choose a size not too big as in the image.

10. Step
Now select white as foreground color. Go on the “Pen Tool”, click with right button of mouse and go to Stroke Path… / Brush and click OK.


11.Step
Double click on this Layer and set the values as in the image.


12. Step
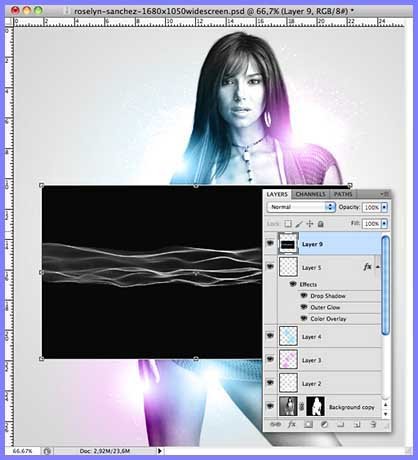
Open the file “Smoke”, select the interested part, copy and paste it into the previous file, (cmd+C, cmd+V (MAC), ctrl+C, ctrl+V (PC)), and set the “Blending Mode” from Normal to Screen.

Change the level by going to: Edit / Transform / Warp.

13. Step
Bring the level below the Layer called “Background copy”. Apply a mask and with the brush cover the excess, while the “Burn Tool” to darken the external part of the smoke as in the image.

Repeat the process as shown in the figure.

14. Step
Add a new Layer and bring it above the level of smoke.

Go to “Brush Tool” and set the values as in the image, then create the stars.


15. Step
Now open the file “Fluid Wave” and import it into the previous file. Transform it by going to: Edit / Transform / Warp.

Change the “Blending Mode” fro Normal to Screen.

Repeat the process, select both Layers and marge them into one Group (cmd+G (MAC), ctrl+G (PC)).

16. Step
Create a new Layer and change the “Blending Mode” from Normal to Color.

17. Step
Now with the “Brush Tool” and with the light blue as foreground color, fill the level as in the image.

Go to Filter / Blur / Gaussian Blur and set the Radius to 20,2 px.

Now change the Opacity from 100% to 75 %.

18. Step
Add a new Layer and paste it above all Layers below (cmd+alt+shift+E (MAC), ctrl+alt+shift+E (PC)).

Change the colors by going to: Image / Adjustments / Color Balance ( cmd+B (MAC), ctrl+B (PC)).
Set the values as in the image:

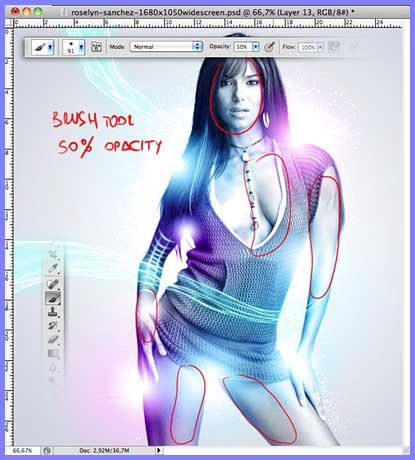
19. Step
Now apply a mask and with the “Brush Tool” cover the parts shown.


20.Step
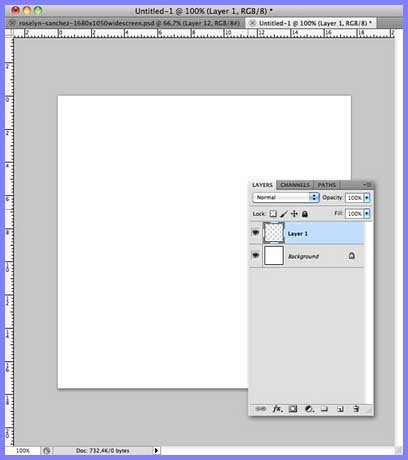
Create a new document with the following values: Width 500 px, Height 500 px, Resolution 72 px/inch and the Background Contents White.

Add new Layer

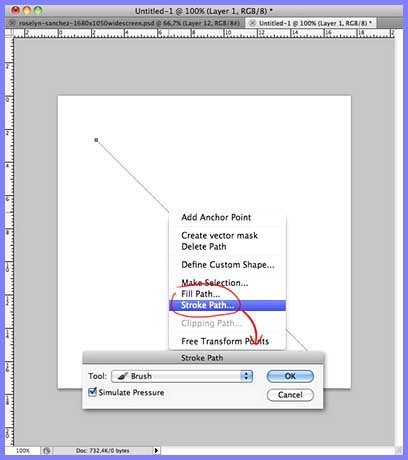
With the “Pen Tool” draw a line as in the image

Go to “Brush Tool” and select the brush size.

Now select black as foreground color. Go back on the “Pen Tool”, click with right button of mouse and go to Stroke Path… / Brush and click OK.

Duplicate the level and flip it horizontally.

Now go to: Edit / Define Brush Preset… and press OK.

Return to the previous file, add a new Layer and select your personal brush.

Using white as the foreground color, create the shine as in the image.

Final Result: Design A Sensational Light Effect in Photoshop
The final result should be like this.

Hope you like this tutorial. I feel really auspicious if you give me feedback through comment below. Soon i am going to show more interesting tutorials. That’s for now.
Credit: psdeluxe.com

Hermitbiker
Posted at 08:34h, 30 November…. very nice tutorial…. thanks for taking the time to post this at “ClippingDesign.com” !!