25 Dec Design an Awesome Bike Racer with Fire Effect in Photoshop

Today we would like to share an amazing bike racer with fire effect tutorial & we want to give you an idea about how to create special fire effect in photoshop. In this tutorial we will include various types of fire effect which is look like creating fire. So why not have a try…
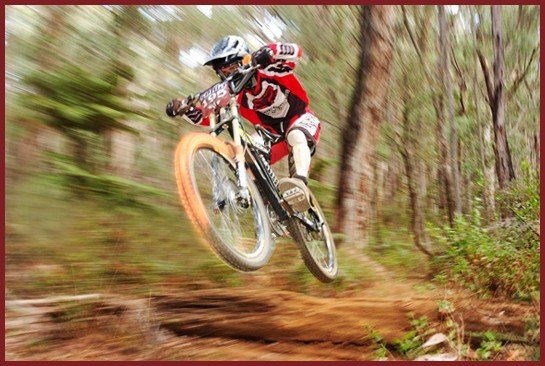
Before we begin, download this photograph taken by lit creations.
Step1
Open the photo in Photoshop, grab the Clone Stamp Tool (S) and get rid of that white line.

Step 2
Now we are going to increase the brightness and contrast of the image. Go to Layer > New Adjustment Layer > Brightness/Contrast. Use 5 for the brightness and 56 for the contrast.

Step 3
Create a new layer (Ctrl+Shift+N), select the Brush Tool (B), select a soft round brush with the diameter of 4 pixels and set the foreground color to white. Then use the Pen Tool (P) to create some paths along the front wheel like I did.

Step 4
Right-click with the Pen Tool (P) on your image and select Stroke Path. Then select Brush and make sure that Simulate Pressure option is checked.

Step 5
Open the Layer Style window and use the following settings for Outer Glow and Inner glow.

Step 6
Select the Smudge Tool, select a round soft brush with the diameter of 30px and set the Strenght to 35%. Then use this tool to transform the lines, so that they look like fire. Probably you will have to try a few times until you get the effect you want.

Step 7
Create a new layer, and then repeat the steps 3, 4 and 5 to create more fire on the front wheel.

Step 8
Use the same technique you learned at the steps 3-7 to create some fire on the back wheel of the bike and on the man`s body.

Step 9
Now we are going to create some sparkles. First, we will have to create a custom brush using the Photoshop`s Brush Engine. Select the Brush Tool (B), go to Window > Brushes (F5) and use the settings from the next image.
Note: to save the brush, click on the ‘Create new brush’ button from the bottom right corner of the Brushes window.

Step 10
Create a new layer and use the brush you created at the previous step with a diameter of 4px to make some sparkles along the fire. Use the white color to create the sparkles and the same layer style you used for the fire layers.

Step 11
Now name all your layers and organize them into groups. This will help you find what you need a lot more easily. Take a look at the next image for reference.

Step 12
Select your ‘Front Wheel Flames’ group, go to Layer > New Adjustment Layer > Curves and use the settings from the following image.

Step 13
Select the Brush Tool (B), set the foreground color to black, select a big soft brush and mask some parts of the Curves layer, like I did.

Step 14
Select the ‘body flames’ group, go to Layer > New Adjustment Layer > Curves and use the settings from the next image. Then use a big soft black brush to mask the entire image, except the flames from the man`s body.

Step15
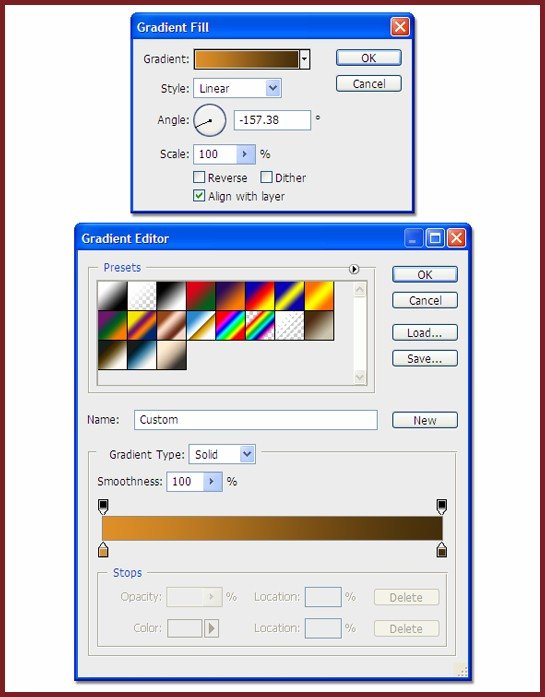
Go to Layer > New Fill Layer > Gradient and use the settings from the following image. The colors I used are #e09028 and #442f0a.

Step 16
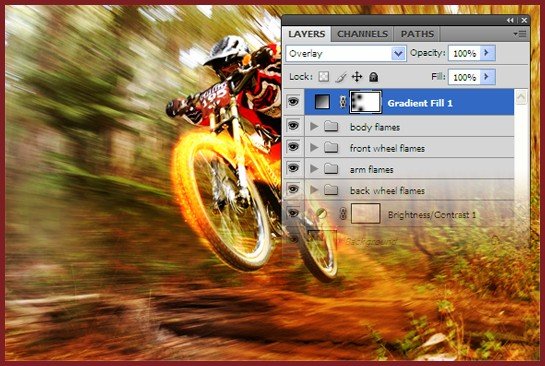
Put the Gradient Fill layer on the top of all the other layers and set its blending mode to Overlay. Then use a big soft black brush to mask this layer like I did.

Step 17
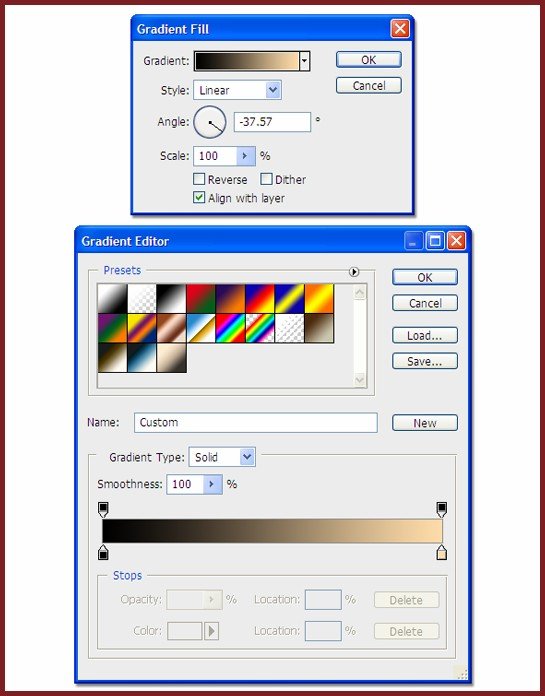
Go again to Layer > New Fill Layer > Gradient and use the settings from the following image. The colors I used are #000000 and #ffdcaa.

Step 18
Put this layer on the top of all the other ones and set its blending mode to Overlay.

Final Result:
Hope you like this tutorial.
I feel really glad if you give me feedback through comment below. Soon i am going to show more interesting & innovative tutorials so please keep visit our blog. That’s for now.
Have fun!
Credit: psdburn.com


Lincoln Solicitors
Posted at 14:25h, 28 DecemberA great tutorial that I am now trying out! Thanks for sharing.
Rosh
Posted at 12:35h, 02 JulyShazzad, thank you very much for your effort. I managed to get the style and technique which I will use in a poster that i’m going to do. Sharing the knowledge one has is the greatest gift you can give.
cheers, Roshan.
Talha Ferry
Posted at 04:57h, 10 JanuaryAwesome tutorial, loved it and its really to follow. Thanks a million
Pingback:30+ Exquisite Photoshop Fire Effect Tutorials
Posted at 19:40h, 12 June[…] Design an Awesome Bike Racer with Fire […]