27 Dec Design Stylish Fire Lines using Photoshop

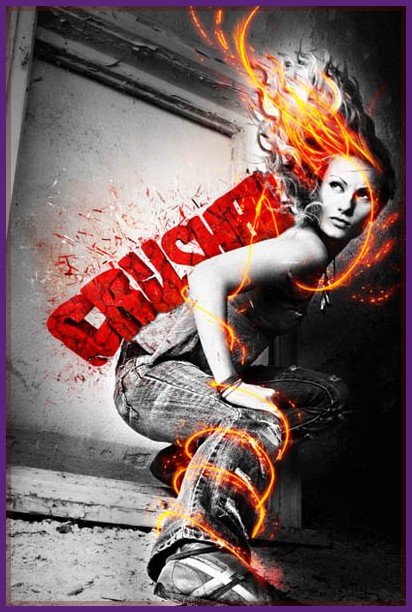
Today I would like to show how to create stylish fire lines in photoshop. In this tutorial we will give only 10 fine points to make fire line effect and use some simple tools that you can easily understand. So, why not have a try…
Step 01
For this tutorial you’re going to need a good stock photo lined up. Something with action…and preferably dark (this effect works much better in a dark setting)

Step 02
Open the stock photo, then go to the paths tab and click create new path.
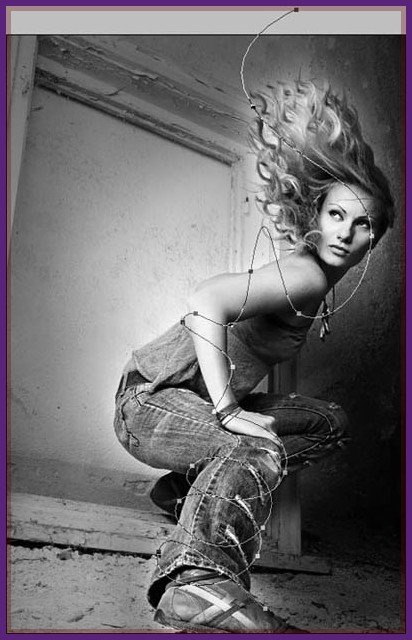
Press “P” on the keyboard to select the pen tool, Get a basic idea of where the fire is going. Keep in mind dimension and action. Swirls do wonders!

Step 03
- Click to start your path
- Click your next point, hold and drag to create a Bezier spine path, which is necessary to create flowing lines
- Continue doing this, following the idea of where you want the fire to go.
Don’t worry about getting it right the first time as you can change the spine at any time…another little tip – if you press and hold ctrl while using the pen tool you can temporarily access the direct selection tool which will allow you to edit the spine (a big time saver)

Step 04
And eventually…you get something like what i have below. Remember that you’re only going to use the parts of your path that are in front of the object your path follows…in this case the models arm, and leg. So don’t waste time trying to make the hidden parts look pretty.

Step 05
- Now you want to select a soft round brush (i used a 5 pixel brush here) and pick an orange color.
- Make a new layer and name it Fire.
- Go back to the paths tab and select stroke path with brush.

Step 06
You should immediately see the stroked path.
On mine you’ll see splatters and flairs that weren’t part of the original path. Those give the fire line the illusion that it is moving, and were accomplished by simply grabbing the clone stamp tool – using a spatter brush and cloning/stamping areas of the path at random.
Step 07
Mask/erase the parts of the path that are behind the legs/arms or whatever it is your paths follows.
Step 08
Right click on the Fire layer and select blending options, and use these options/values.
Feel free to play with the settings (that’s how i discovered this technique)
You might end up with something better!

Step 09
Duplicate the Fire layer, and set the layer mode to OVERLAY
Click the eye next to inner shadow and inner glow on the duplicate layer to deactivate them.

Step 10
Now double click on outer glow on the duplicate and change the values to this.

Final Result:
Spend a little time, and you can make something like what we have below.For a different effect, duplicate the fire layer again, and filter>distort>wave.Play with the opacity levels, and play with the blending modes – particularly overlay.

Hope you can learn something new from this tutorial.
I feel really glad if you give me feedback through comment below. Soon i am going to show more interesting & innovative tutorials so please keep visit our blog. That’s for now.
Have fun!
Credit: anothera.net

Sorry, the comment form is closed at this time.