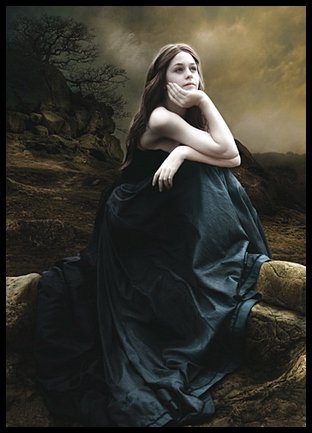
01 Oct Dynamic Lighting Effect Tutorial using Photoshop

Today I am introducing you a simple and short tutorial. In this tutorial I’ll show you how the same lighting principles can be applied to your photo manipulations. You’ll start by assembling stock images, then harmonizing their color and tone with some non-destructive adjustment layers. Finally, we’ll use some clever masking and painting techniques can really add another dimension.
Introduction:
You can download free images that we used for the tutorial. We use The landscape, Clouds & The model [http://faestock.deviantart.com/art/Bells-Falls5-89939037]. It is easy to create the effect and so much useful. So download those images then open up your Photoshop and get start!
Step 1:
Create a new A4 portrait canvas in RGB mode at 300dpi. Add the landscape image as a new layer, hit Cmd/Ctrl + T to bring up the Transform menu, select Flip Horizontal, and label the layer ‘Hills’. Don’t worry about the white space at the bottom – this will be hidden later. Hold Alt/Opt while choosing a Levels adjustment, tick the clipping mask option, then set the white point output to 219. Look at below:

Step 2:
Import the clouds image as another layer, set its blending mode to Multiply, Transform it as before and name it ‘Sky’. Use the Clone Stamp tool (set to Current Layer) to repeat areas as required. Next, add a layer mask and use a variety of soft-edged brushes to blend the clouds into the landscape – our mask is shown in the inset.

Step 3:
Open the model and isolate her, along with the foreground rocks, using the Pen tool. It’s impossible to extract every strand of hair, so plot your points just inside the more defined areas. Generate a path-based selection, Feather by 1 pixel, and Copy > Paste as a new layer. Now use a 1-pixel Smudge brush to carefully pull some hair strands out. Name the layer ‘Girl’.

Step 4
We now need to darken the foreground rocks; create a couple of closed paths as indicated in white, then make a path-based selection. Hit Cmd/Ctrl + J to float the selection as a new layer and label it ‘Rocks’. Clip a Levels adjustment as you did in step 1 and set the midpoint input to 0.57, and the whitepoint output to 244.

Step 5
The tonal range of the foreground rocks now matches the rest of the image, but they also need some color refinement. Clip another adjustment layer to the Levels – but this time select Color Balance. Set the midtone red to +16 and the blue to -32. Next, tick the Highlight box and set the blue to -14.

Step 6
Next, we’ll fine-tune the colour range of the entire composition. Add a conventional Hue/Saturation adjustment layer at the top of the stack to affect all layers. Now use the Edit drop-down menu to set the reds to -67, the yellows to -29, the cyans to -44, and the blues to -18.

Step 7
Drop an empty layer at the top, choose Image > Apply Image, then select the Blue channel from the drop-down menu. Set the layer’s blending mode to Multiply and its opacity to 90%, then name it ‘Blue channel multiply’. Add a mask and use a variety of soft-edged brushes to reveal the light source. You can paint directly on the mask and within layer-based selections from the ‘Girl’ and ‘Rocks’ – our mask is shown on the inset.

Step 8
And finally we’ll accentuate existing highlights on the model nearest the light source. Add a new layer set to Overlay labelled ‘Highlights’ and paint within a layer-based selection from the ‘Girl’ using a variety of white, soft-edged bushes at low opacity – this white layer is shown over black (for clarity) on the inset.

I hope you like this tutorial. I feel really auspicious if you give me feedback through comment below. Soon i am going to show more interesting tutorials. Thats for now.
Thank you…
Final Image:

Credit:- digitalartsonline.co.uk

Vvb
Posted at 22:58h, 17 MarchFantastic tuts!! – being looking for the that for weeks!
Do you have more of those? I’m especially looking for color&toning.