
19 May How to Create Glowing Light Effect in Photoshop

Today we will describe how to create glowing light effect in photoshop. In this tutorial we are using the blending options, pen tool and a little imagination, we’ll show you how to add mood to an image by creating glow effects and light streaks. So, let’s have a try…
Open your selected image.
Image ID: 4918599 © Alexander Yakovlev 123RF.com

Step 1:
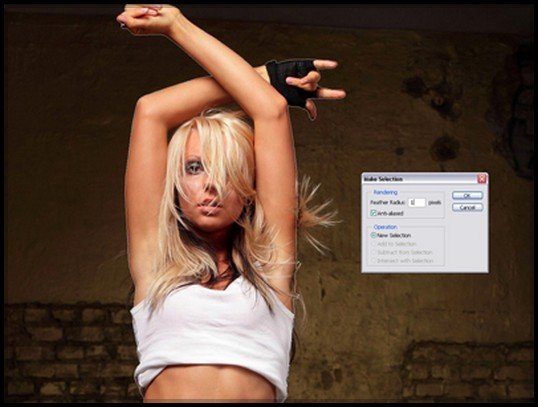
Now, use your best preferred method to extract the Dancer from the image. We will be using the Pen Tool (P) for this. Trace the outlines of the Dancer and with the Pen Tool selected, make a selection path by right clicking on the image and choose “Make Selection”. Set Feather to 1px and select Anti-Aliased.


Step 2:
Copy (Ctrl+C) the selection, paste (Ctrl+V) it into a new layer and name it as “Dancer”.
Step 3:
Duplicate the layer for “Dancer”. Adjust the Brightness and Contrast (Image > Adjustments > Brightness and Contrast) for “Dancer copy” layer.

Step 4:
Select Dancer layer. Go to Filter > Blur > Motion Blur. Set the Angle at 40 degrees and Distance at 120 pixels. Merge both Dancer layers.

Step 5:
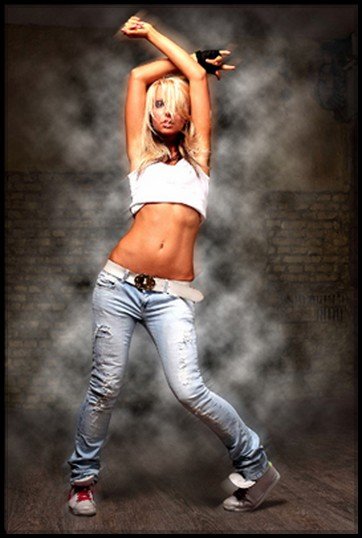
Create a new layer under “Dancer” and name it “Smoke”. Using the Lasso Tool (L), draw a shape around the Dancer. Set Feather to 150px.

Step 6:
Make sure your foreground color is white, and background color, black. Now go to Filter > Render > Clouds. After that, set layer properties to “Overlay”.

Step 7:
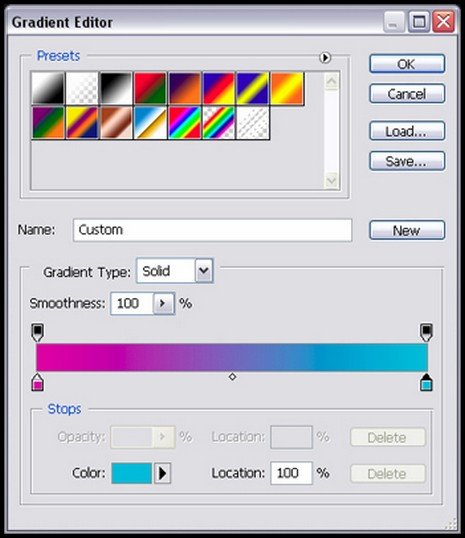
Create new layer under “Smoke” and name it “Gradient”. Select the Gradient Tool (G) and click the Gradient Editor. Set the foreground color to #c6229e and background color to #1dbdda. Apply the Linear Gradient Style at 45 degrees from the top left corner to the bottom right corner, at 60% opacity.
Step 8:
Set this layer’s properties to “Overlay” as well. Merge both “Smoke” and “Gradient”. Once done, you should have something like this:
For this step, you can also experiment with other gradient styles and color to create the combination you like best.

Step 9:
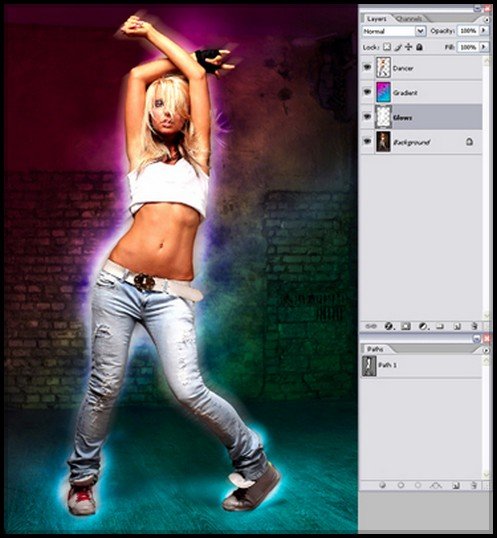
Create a new layer under “Gradient” and name it “Glows”. With white selected as your foreground color, use a rounded soft brush (B) and paint along the sides of the Dancer. This will create the effect of glows behind the dancer.
Step 10:
With the brush tool selected, go to the brush palette (F5) and enter the following settings.

Save this brush by clicking “Create New Brush” and name it “Splash” (you can now select it from the bottom of your brush list for later use). Randomly brush around the image to create your desired effect.

Step 11:
Create a new layer, name it “Streaks”. The name says it all. We’re going to make light streaks. This part will require a little trial and error to get the right feel you want. What you need to do is, use the Polygonal Lasso Tool (L), and create a triangle. Then, By using a soft white brush (B), paint on the opposite side of the triangle base. You can also experiment with different shapes and sizes to create the effects you want.

Step 12:
Now we’ll create some light reflections on the Dancer. Create a new layer above the Dancer and Set Layer Properties to “Color Dodge”. Ctrl+Click on the path of the Dancer we made earlier. With the Dancer selected, use the Eyedropper Tool (I) to pick the colors of the glows around the Dancer and use a soft brush to gently colour her sides.

Step 13:
Now we’ll create some light trails.Create a new layer named “Trails” above the Dancer.
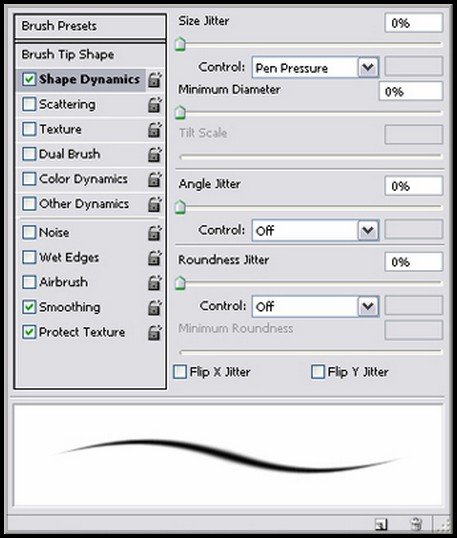
Set the foreground color to white and select the Brush Tool (B), then go to the Brush Presets. Select a soft brush at about 9px and toggle “Shape Dynamics”and set “size jitter control” to “Pen Pressure”. This will give your brush strokes a more distinctive appearance.
Step 14:
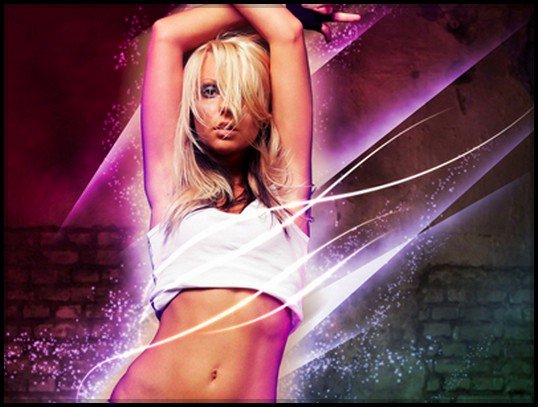
Now use the Pen tool (P) and create paths where you think the trails should be. Once shape and placement is confirmed, right click and select “Stroke Path”. Set tool to brush and check “Simulate Pressure”. Pen strokes will be applied to your paths.

Step 15:
Now double click the Trails layer to bring up the Blending options. Check “Outer Glow”. We’ll be using these settings.

Step 16:
After that, mask away unwanted parts of the trails. You now can just go wild and add more elements to you image to make it look even more unique.

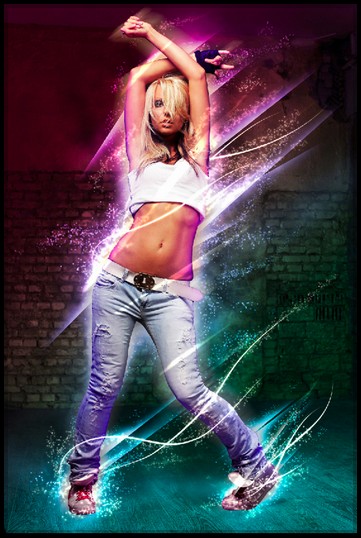
Final Result:
Hope you can learn something new from this tutorial.
I feel really glad if you give me feedback through comment below. Soon i am going to show more interesting & innovative tutorials so please keep visit our blog. That’s for now.
Have fun!
Reference: 123rf

Shaheb
Posted at 16:34h, 19 Maygood
Gladys Littrell
Posted at 03:06h, 11 MarchI love it!
I’m gonna try it! <3
Media Infonetku
Posted at 12:41h, 17 Augustthanks…greatful
Pingback:Top glowing light effects Tutorials | Simpler Designs
Posted at 03:54h, 19 August[…] View Tutorial […]
Brandon
Posted at 18:35h, 20 DecemberThanks for sharing your technique!
ElabStudios
Posted at 06:01h, 08 FebruaryOMG. I never thought this would be this much easier. This will really come in handy :). Credits to you.
Fanny
Posted at 13:07h, 18 AprilI’ve been surfing online more than three hours nowadays, but I by no means found any attention-
grabbing article like yours. It’s lovely value enough for me. In my view, if all site owners and bloggers made excellent content as you did, the net will probably be much more useful than ever before.